Creating a Connection
One of the most important concepts in Surrealist are connections. Connections store the details required to connect to a database, such as the endpoint, namespace, database, and authentication details. Additionally, they track information such as query history and pinned explorer tables. One of the first things you will need to do when using Surrealist is to create a new connection.
If you are looking to simply experiment with Surrealist or have not yet set up a database, you can use the Sandbox environment. This environment allows you to test and experiment without installing the SurrealDB database or storing data persistently. For this tutorial we will hover skip the sandbox and create a connection to a remote or local database.
Creation dialog
The first step to connecting to a remote database is making certain that the database is running and accessible. If you have not yet set up a database, please refer to the getting started guide. Once you are certain the database is running, we can return to Surrealist and create a new connection.
Opening the creator
When you first launch Surrealist, you will be greeted by the start screen. From this screen simply press "New connection" to open the connection creator. If you have previously already used Surrealist, you can instead press the connection name in the top left of the interface to open the connection list. From here you can press the plus button to create a new connection.
Configuring the connection
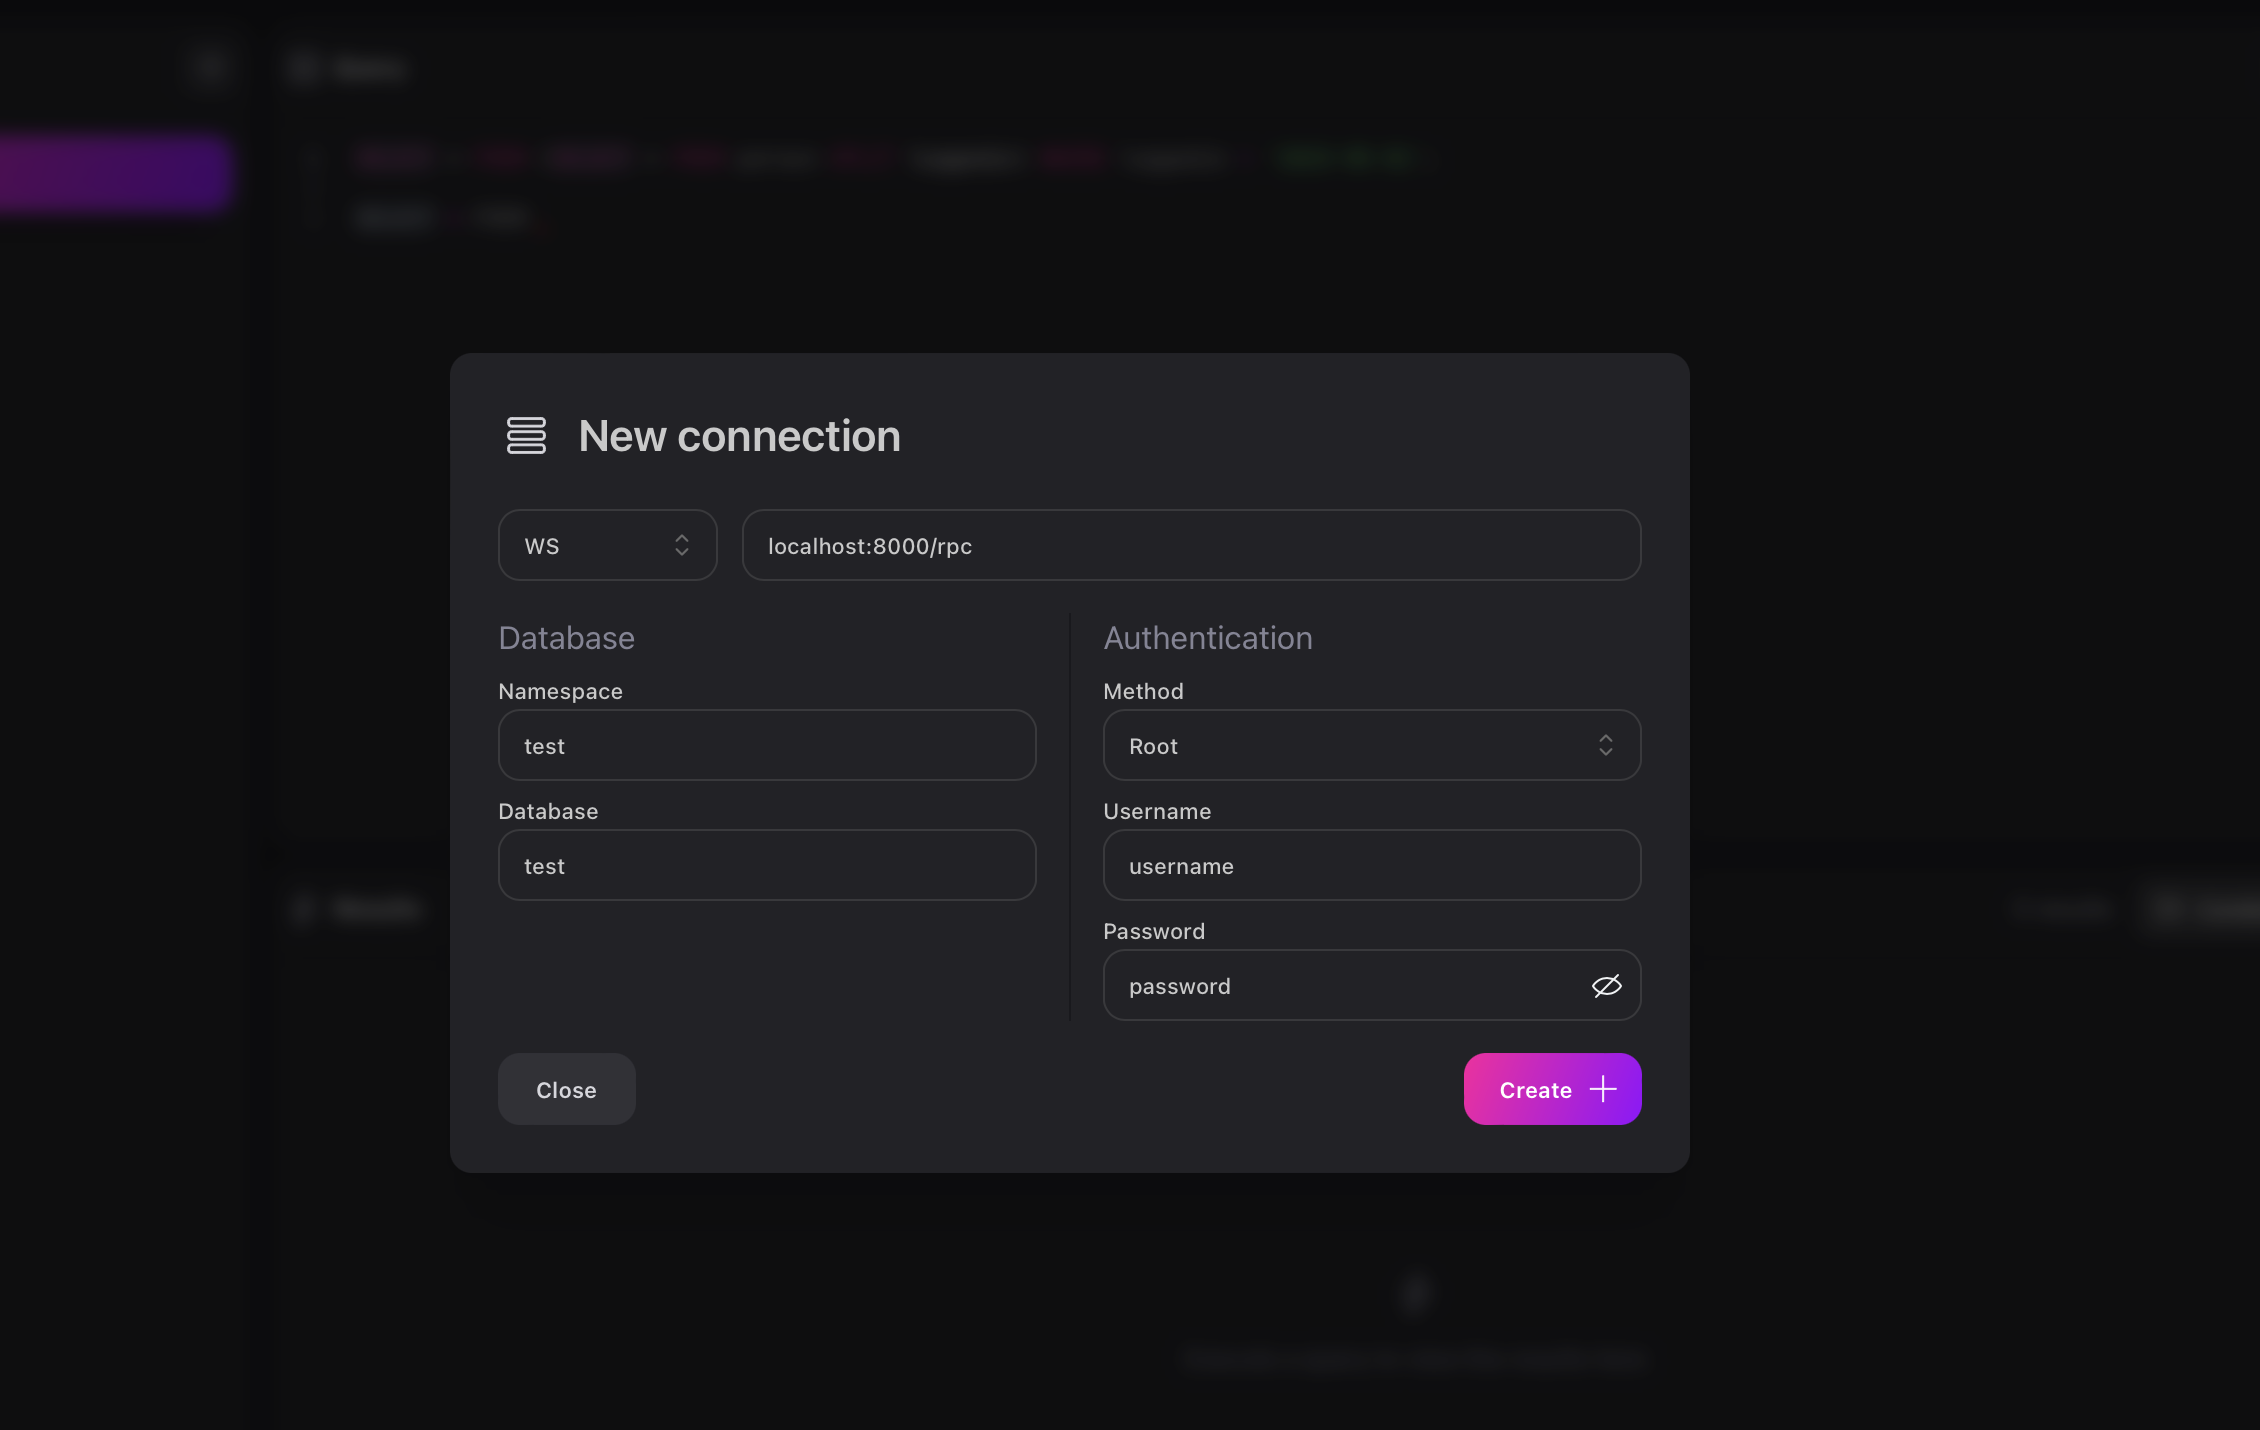
Once you have opened the connection creator, you will be prompted to enter your database details. These details are required to connect to your SurrealDB instance.
The first step is to select the protocol you wish to use to connect to the database. If you are unsure, select HTTP, as this is the easiest protocol to use. We do hover recommend
securing your database with an SSL certificate when possible, in which case you should select HTTPS or WSS.
After this you will enter your endpoint. This is often either an IP address or a domain name. If your database is not exposed through port 80 or 443, you should also specify the port in the endpoint field.
Next you will enter the namespace and database you wish to connect to. If you are unsure or just looking to get started, you can use test for both fields.
Finally, you will select the authentication method you wish to use. Depending on the selected authentication method, you will be prompted to enter additional details such as a username and password, or a token.
Opening the connection
Once all requires fields are provided, press the "Create" button. Surrealist will automatically attempt to connect to the database using the provided details. If the connection was successful, you will see a green indicator next to the connection name in the top left of the interface, however if the connection was unsuccessful, you will see a red indicator instead.
When your connection fails, make sure your details are correct and that the database is running and accessible. You can hover over the connection name and choose the option "Edit connection" to modify your connection details.
Running a local database
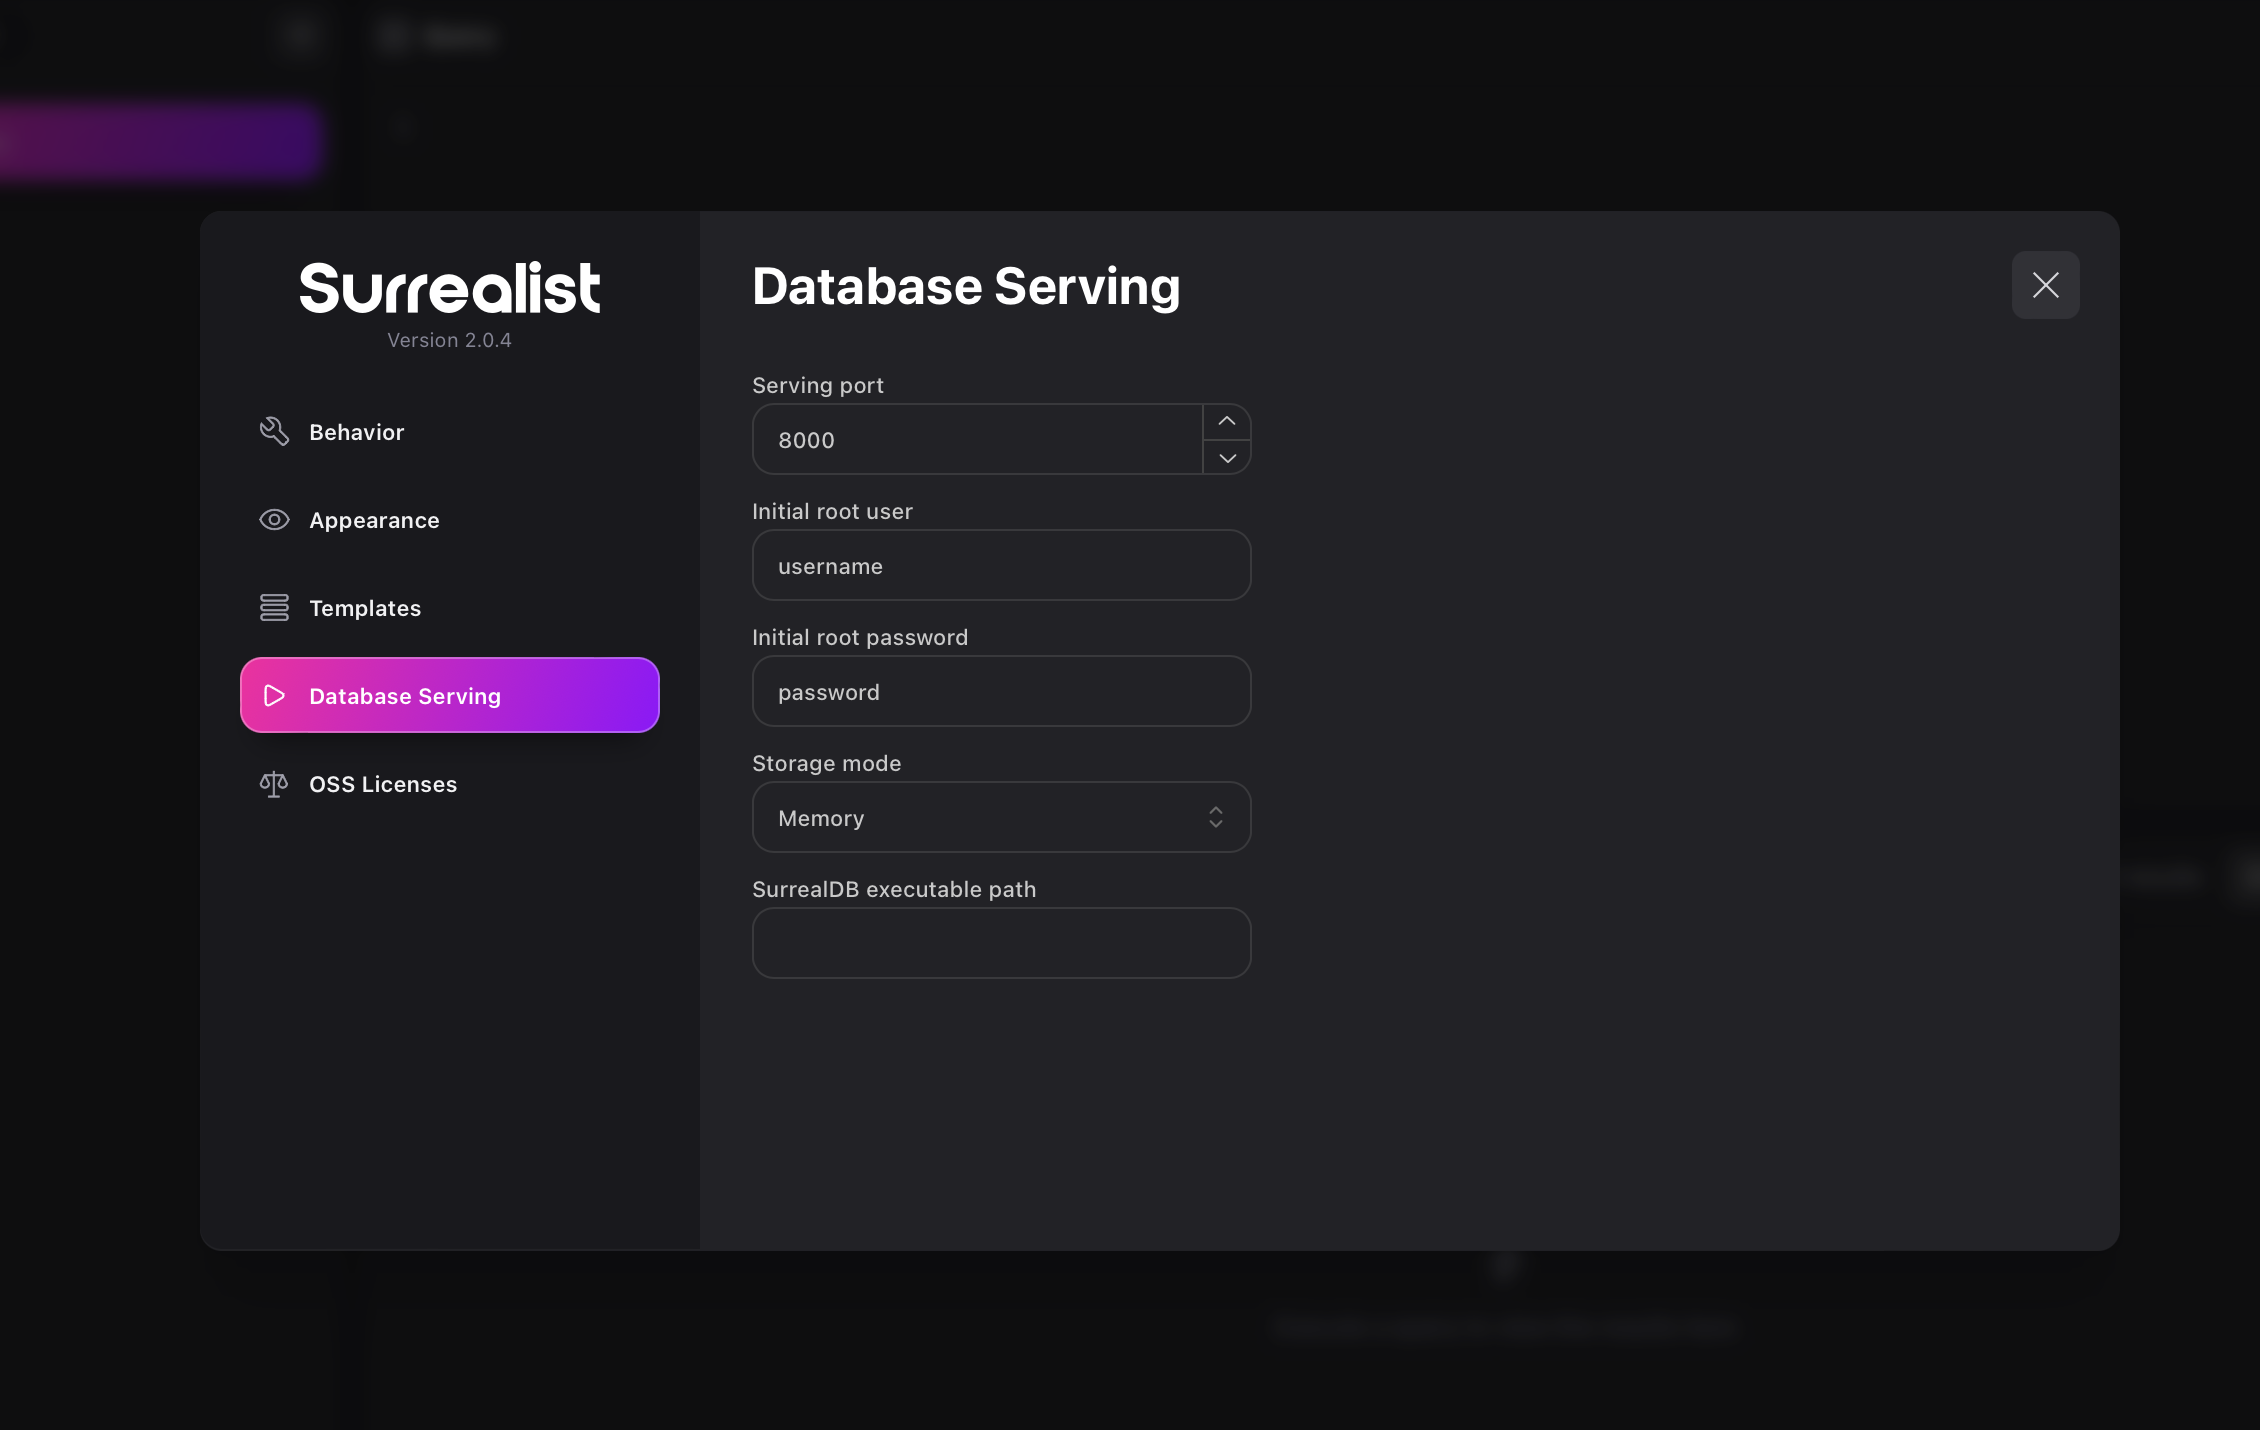
Surrealist Desktop comes with built-in database serving functionality that allows you to run a local database on your machine. Before you can use this, you must install SurrealDB for your operating system by following this guide.
Once SurrealDB is installed, simply press the play button in the top right of the interface to launch a local database. This will start a database serving on your machine, which you can connect to using the same approach as a remote database. You can find options to configure this behavior in the settings dialog under the "Database serving" tab.